Sunday, October 31, 2010

Some RAK just for me!

So, I've been REALLY slack with sharing my RAK (Random Acts of Kindness)! I received these cards a little while ago but I'm so happy to share them with you now.
Such lovely friends I have made through the wonderful world of stamping - I have been so darn blessed!

- - - - - - - - - - - - - - - - - - - - - - - - - - - - - - - - - - - - - - - - -
First, I'd like to share with you the card that Bronwyn Eastley made for my Birthday. Now I feel so so SO guilty as her Birthday was before mine, and yet she still doesnt have a card from me. *blushes*...Bronwyn, you have one hell of a card coming your way soon, I PROMISE!!!
Bronwyn has used some really funky suede paper for this card. Nothing like a bit of "touch & feel" I say!

Superb rose too, Bronwyn...I wonder if you know of a good 'rolled rose tutorial'!!! hehehe - cheeky!

- - - - - - - - - - - - - - - - - - - - - - - - - - - - - - - - - - - - - - - - - -

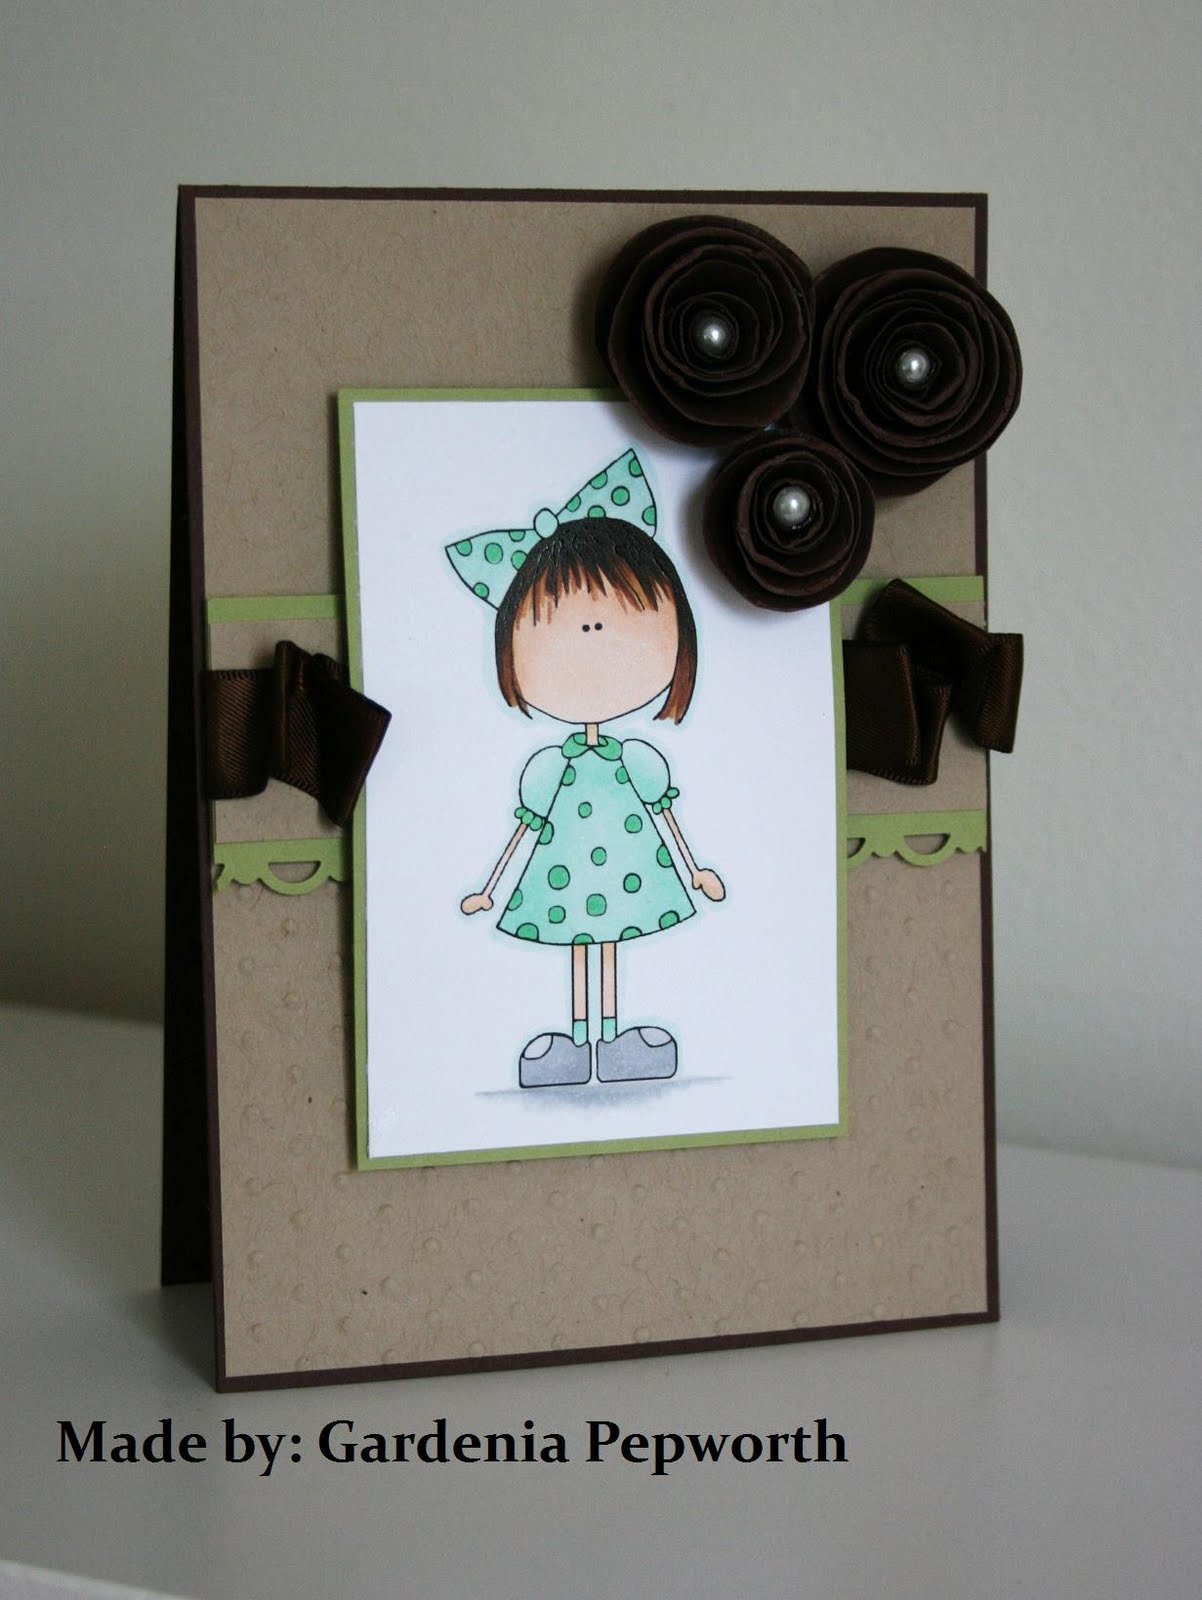
Second, this is Gardenia Pepworth's card she made for my Birthday. I wonder if SHE knows a good rolled rose tutorial as well?! Gardenia's colouring really really really makes me want to get into the world of Copics, but I've resisted so far! This image is absolutely AMAZING up close and personal - great job Gardenia! - - - - - - - - - - - - - - - - - - - - - - - - - - - - - - - - - - - - - - - - - - - -
Thirdly, (is that a word?) this stunning little number was given to me by Patrice Easton. I just love Stampin' Ups (retired) Bella Rose DSP! It's so flowery and pretty! And Patrice's bow is just PERFECT! Thank you Patrice - I've had it on my TV Unit since the day I received it. I love it so much I don't want to put it away in craft room! (that must say I watch more TV than do crafts!...hmm).
Thank you, my special friends, I absolutely adore receiving special cards and things in the mail, you can guarantee you made my day/s when I received these ones!
THANK YOU.
post signature

Elements of Style Butterfly


I have had such a lovely day today - the first day in a long time where I have had the time and the motivation to stay in my craft-room and C R E A T E ! And it was so so so lovely!

First cab off the rank was this one, a shameless CASE from the amazing Teneale Williams. Oh how I love her style!

I changed a few things around to make it more of a "quick card" for mass-producing cos I may be in the need for some of those types of cards very soon!
post signature
So exciting: I reached 50 followers today on my blog! I'm so excited!

- - - - - - - - - - - - - - - - - - - - - - - - - - - - - - - - - - - -
stamps: elements of style, Papertrey
ink: basic black, versa mark, cherry cobbler, old olive
cardstock: crumb cake, confetti cream, basic black
clear embossing powder, dimensionals, 1 3/4" oval punch, beautiful butterflies bigz die, twill

Friday, October 29, 2010

Just Add Ink #41 - Birthday

This week at Just Add Ink, the challenge is to Just Add....Birthday and I just couldn't resist this gorgeous retired set, Blooming With Happiness....I love it so much!
I have stamped the cake image on a piece of acetate with black Stazon, and then added a little bit of Crystal Effects and Dazzling Diamonds. I cut out the circle and attached the acetate to the back of the front cover of the card. I like the effect of the little window!
cardstock: baja breeze, pear pizzazz, whipser white,
ink: white stazon, black stazon, basic black, versamark
stamps: blooming with happiness, a little birthday cheer, always
accessories: top note die, white organza ribbon, clear embossing powder, white gel pen, acetate, hemp twine

post signature

Thursday, October 28, 2010

Best Blog Friends Forever Award

After a busy little day today, I came home to find:
- a CREDIT invoice from Telstra (not something you see everyday!)
- a letter from the Department Of Education with my Safety Screening Assessment (been waiting for it to arrive)
AND
- the new Summer Mini Catalogue and Impressions! All good news! No bills!

THEN...I jump on the comp for a while to find that Claire Dauncey has awarded me with this special award! Go have a look through her awesome blog, Coffee At Claires,
here.

Loving today!!!


- - - - - - - - - - - - - - - - - - - - - - - - - - - - - - - - - - - - - - - - - - - -
I would like to pass this Award onto the following 8 lovely ladies:
Patrice Easton
- Mae Collins
Rochelle Wright
- Gardenia Pepworth
Bronwyn Eastley

- Amanda Aitken
Jodene Tripp
- Christine Blain
Make sure you pop over and check out their blogs. ALL are nothing short of amazing and inspirational! You can find their links on the left-hand side of my blog! (I had some computer gremlin stopping me from linking their names tonight. Sorry).

post signature

Wednesday, October 27, 2010

Aislin's 4th Birthday Card

It's my friend Naomi's daughter's birthday again and this is the card I made with her in mind - cos she is as "cute as a bug"!
Here is the card I made last year for Aislin...and it was one of my very first entries on my blog!


This is the 1st time I've inked my Kimono Kids set and I was reminded of some really lovely paper I had (somewhere!) that would go so well with this little girl....well I found it and here it is!!!!
post signature

Thursday, October 21, 2010

Felicity's Baby Boy Card

A friend of a friend had a little baby boy the other day (Bailey), so I'm going to pop this card off to her in Adelaide. I CASE'd from here.

cardstock: basic grey, certainly celery, confetti white
ink: marina mist, versamark
stamps: nursery neccesities
certainly celery grosgrain ribbon, scallop edge punch


post signature

Monday, October 18, 2010

Jenn's Card & Gift

I have made this card for a special friend Jenn, who is very unwell at the moment and I wanted something to brighten her day - so BRIGHT I made! You may have seen this design before? I CASE'd myself here! I have made my own little tutorial on how this flower was made - there are plenty of variations, but you can see what I whipped up here. And....the little goody bag! You can find the tutorial I used here. This one is filled with choccies - I really hope she likes them!Any questions, please drop me a line!

cardstock: melon mambo, peach parfait, confetti white,
stamps: en francais, friends 24-7
,
post signature

Sunday, October 17, 2010

Operation Christmas Child 2010

We are all aware that Christmas is coming early, and the shops are already stocking their shelves full of decorations, food, cards and presents. But I'd really love to encourage everyone to give to someone else as well this year. There are plenty of organisations out there with lots of different ways to help others.

This week, I am going to start a shoe box for Operation Christmas Child.

It's not hard.

I love being creative - so it's an awesome way to send some love to a little person out there who wouldn't receive much or anything this Christmas.

All you have to do is:
1. Decorate a shoe-box sized box.

2. Stick a label on it saying "Boy" or "Girl".

3. Fill it with little pressies, toys, clothes, books, food, crafts, etc.

4. Pop in your $9 donation which covers costs getting it to a child.

5. And then drop off at your nearest drop-off point! That's it!

You can find all the details at their easy-to-read site

here. Please visit.

Once I find a box, I'll take pics and share here on my blog, to encourage and remind you to do the same! Thanks for taking the time to read! Would love to see your box/es too!
post signature

Friday, October 15, 2010

Just Add Ink #39 - Beyond Blue

We have another great challenge at Just Add Ink this week....Just Add Blue. Beyond Blue is a National Depression Initiative and October is Beyond Blues Anxiety and Depression Awareness Month.

We have been encouraged to make a card or something to give to a friend, a stranger, or just someone we don't know very well to say hi, that we're thinking of them, that we care or just to make someone smile! How awesome is that!!! I'm sending my card to a friend who unfortunately has terminal cancer and I have been very slow in getting a little package in the mail to her. I hope it brightens her day just a little!You can see my tutorial on how I made this rose, using the Fancy Flower Large punch.... here. Check it out and let me know what you think!

stamps: friends 24-7, en francais, occasional quotes
ink: marina mist, night of navy, crumb cake, whisper white
cardstock: confetti cream, night of navy, marina mist
1 1/4" striped grosgrain ribbon in night of navy, basic pearls, sponge daubers, hemp twine, Top Note die, Lots of Tags die, fancy flower large punch

post signature

Paper Rose Tutorial

Hi! Welcome to my tutorial on how to make the paper rose that is on my Just Add Ink #39 Challenge Card. Please forgive the differences in colour and brightness.

You will need:
- Fancy Flower Large Punch

- Skewer or Paper Piercer
- Scissors
- Glue, Sticky Strip, or Crystal Effects (your personal choice)

- Sponges/Sponge Daubers
- Ink


Please note...I did not invent this rose. I have merely just taken my own step-by-step photos for those who haven't yet seen how to make this amazing flower.


"WARNING: Following are LOTS of photos!
Photos tell a thousand words!"


1. Punch out 3 Large Fancy Flowers. (here I used Melon Mambo).

2. With all 3 flowers, bend the edges of each petal using your bone folder. (As if you are curling ribbon). Don't worry if your paper gets creases or starts to split.

3. On the 1st flower, cut a slit into the middle between two petals (this photo does not show this step - sorry!)
On the 2nd flower, cut into the middle and cut out one petal.
One the 3rd flower, cut into the middle and cut out two petals (but keeping them whole).
You should now have 5 pieces.

3. I like to add some shading to the edges of my petals by rubbing an inked sponge dauber over the petal edges. Here I used Riding Hood Red.


4. Instead of using glue, I like to use small strips of Sticky Strip. I get them ready by hanging onto my Stamp-a-ma-jig. You can use glue, or Crystal Effects, but I find its less messier if I use Sticky Strip.


5. With your one single petal, roll it up (I use a skewer to help me, but you could use your paper piercer). The pointy end of the petal is going to get cut off very soon.

6. Probably the most trickiest is the 2-petal piece. Bend/roll together. Try to make it like a cylinder.

7. Take your 3-petal flower and with the petals facing downward, bend so one petal overlaps the other one. This is a bit tricky at first but perservere. I find it easier to "roll" it to each other rather than folding.
8. Take the 4-petal flower and join together, remembing to keep the petals facing downward.
9. Take your whole flower (the one with just a slit into it), with the petals pointing downwards, bend one petal slightly on top of the one next to it so it sits on top - adhere with Sticky Strip.

Don't worry if it's not looking perfect. Flowers are never perfect and it will all come together once the flower is assembled!You should have all your pieces looking like above.


The next step is to cut off the points so it can sit more flat and deeper into the centre of each layer.

10. Here I used Crystal Effects to glue each layer together.


And the finished product!!!!


Every flower I make is totally different to the last one I made! I like that about them. They are handmade and each one is individual.

VARIATIONS:
1. Sponge CONTRASTING colours onto the edge of the petals eg. purple on pink, orange on yellow etc.
2. I like to spray my flowers (before or after assembling) with a Shimmer or Glimmer Mist/Spray.
3. Curl petals more or less for a different look.
4. Crumple up you card stock or run through Crimper serveral times to get a softer flower.
5. Stamp onto your punched out flowers BEFORE assembling, I have used Baroque Motifs flourish on mine and I love that look.

I hope it all makes sense to you and I would love to see any roses you make in the future! Thanks for hanging in there - it is a rather long photo-tutorial!

post signature

Thursday, October 14, 2010

Sneak Peak!

Ooooo!!!!!!
post signature

Monday, October 11, 2010

Our Hobart Weekend

Charlotte and I headed off down to Hobart this w'end (2hrs approx). We got halfway there when we saw these awesome "hedges/bushes" that have been shaped into animals. As a child, it was the highlight of any trip to Hobart. Charlotte was on the lookout for the rest of the trip but unfortunately they're more or less in one area. We stayed with my friend, Kobi and her husband Mariusz and their "boy" Tomasz. Kobi is over 8months pregnant so it was a real treat to be able to spend some quality time with her before her life gets even more busier. Here's the children in the bath on the 1st night. (Charlotte was over-the-moon to be able to have bubbles - we have terrible water pressure in our bath so she never gets bubbles anymore.Then on the way home, I pulled over the side of the road to use my mobile and Charlotte suddenly screamed out at me from the backseat, "Look mum, deers!!!"...and there were about a dozen of them. Wild ones. It was only a matter of a few hundred metres from a Highway. Its not a sight we get to see everyday here in Tasmania. I threw down my mobile, grabbed my camera, swapped my lenses and zoomed in and got a few pics before they ran off. I think a crazy woman with a big lense hanging out of the car and a screaming-with-excitement 4yr old was all too much for them! But I was so happy to have spotted them for a few minutes anyway. And look at that white one!!!So, we drove to Hobart to spend time with my bestest friend and didn't even take a pic of her!!! (Not that I would've been allowed anyway). She looks so damn amazing pregnant but I know she's looking forward to their new son's birth in the next few weeks.

I'll never forget this weekend.
post signature

Related Posts Plugin for WordPress, Blogger...